800-222-6047

Industry News & New Products

  • Best Automotive Lockout Kits of 2022

    by Nate Kuennen | Jul 08, 2022

    act-sjpro-access-tools-slim-jim-in-use-june2022-hi-res-5

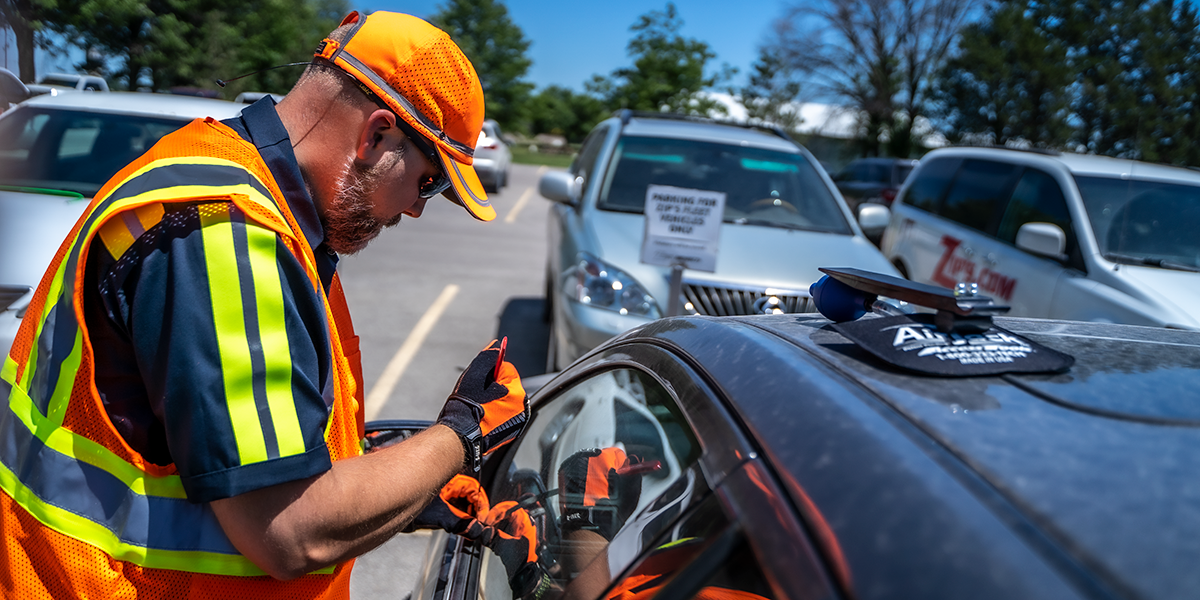
    Doesn’t matter who locked the keys inside the car. What matters is what you’re going to do to get them out. Zip’s AW Direct offers several car-opening kits to help automotive professionals gain access to locked vehicles.

    In today’s blog, we’re going to look at some of our best-selling kits from different manufacturers. We’ll start with basic packages and finish with the most comprehensive kits, going over each lockout kit contents. Each one brings its own value, price-point and distinct lockout advantages.


    Steck’s BigEasy Door Tool Kit  See Details

    at32-1-steck-bigeasy-pink-long-reach-tool-web

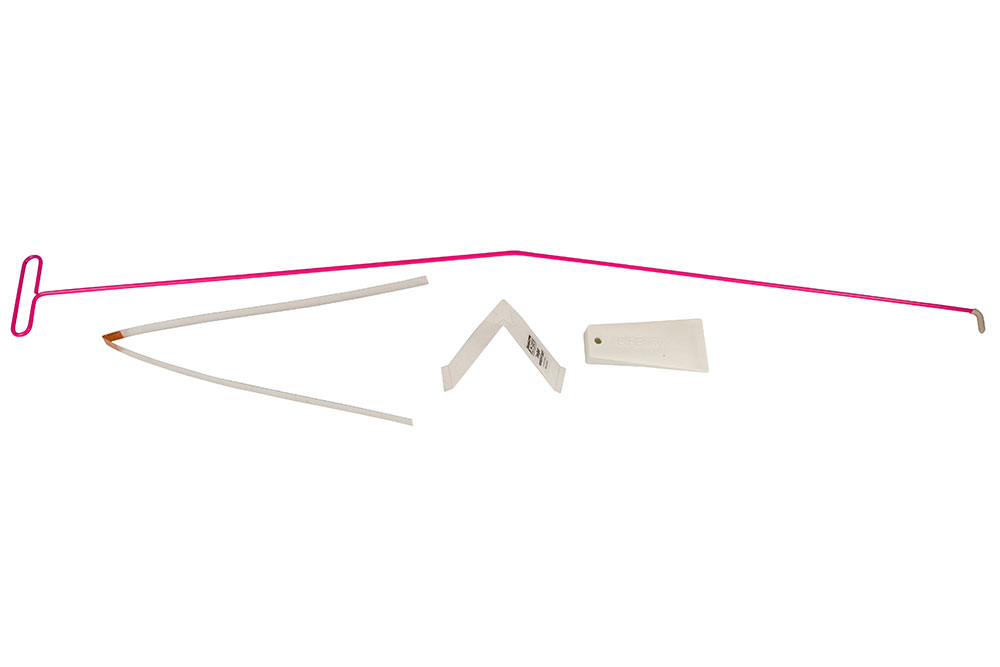
    (1) 4-1/2' L long reach tool
    (1) Glow-in-the-dark tip
    (1) Window wedge
    (1) Paint protector
    (1) Lock knob plastic strip tool

    Steck's BigEasy door tool kit includes a fluorescent pink long reach tool with glow-in-the-dark properties. This allows for better visibility in low-light situations. Featuring a T-handle for better maneuvering, the long reach tool will appear white in the daylight and then bright pink at night.

    This kit also features a window wedge and other essential accessories for most unlock scenarios. With customer service in mind, the paint protector, rubber tip and plastic strip all combine to prevent unwanted scratches to the vehicle.


    AW Direct Big Blue Long-Reach Door Tool Kit  See Details

    tm62k-1-aw-direct-long-reach-door-tool-kit-web

    (1) Rigid plastic window wedge
    (1) Long reach door tool
    (1) Protective rubber tip
    (1) Inflatable air wedge 
    (1) Carrying case 

    This convenient door tool kit from AW Direct includes a zippered, black carrying case so your tools will stay organized, stay together, will be easy to transport and will be ready to go to work when you need them. 

    Similar to Steck’s BigEasy offering, this kit also features several properties to protect your customer’s vehicle. The inflatable air wedge won’t scratch windows or paint, and the rubber tip on the end of the long reach tool will soften any button or lever action.


    Pro-Lok 4 Piece Extra Length Long Arm Lockout Kit  See Details

    ak42-laxl-pro-lok-long-lockout-web-1

    (1) Extra Long Arm tool
    (1) Plastic sleeve
    (1) Pump wedge
    (1) Mini rubber wedge

    By now, we’ve established the importance of protecting your customer’s vehicle and finish with soft air wedges, plastic paint protectors and rubber rod tips. What makes this four-piece kit from Pro-Lok different from the first two is the additional length of the long reach tool. 

    At 76”, the Extra Long Arm tool is nearly two feet longer than the standard 4-1/2' long reach tool. Most of these door tools work alongside the window to reach door control buttons. With Pro-Lok’s kit, you now have the ability to reach across the vehicle’s interior.

    With a direct line of sight, you can easily position the long reach tool to depress the unlock button, access the pull handle, lift the lock button and even retrieve the keys. With this improved viewing angle, the only better position would be from inside the vehicle.


    Sully Tools Basic Door Tool Kit  See Details

    sul122-sully-tool-basic-door-kit-web-1

    (1) Sully Pouch carry case
    (1) Sully Strip 
    (2) Handle Wedges 
    (1 ) Sticky L 
    (1) Sully J 
    (1) Sully Big Foot 
    (1) Sully Dipper 
    (1) Sully L 
    (1) Sully Drop Hook 
    (1) Sully Double Dipper

    Unlike the first three kits, Sully Tools’ Basic Door Tool Kit gives us our first look at In The Door tools, a separate category at Zips.com. The previous kits just featured long reach tools, which work well between the door frame and window weatherstripping to access the door controls.

    With In The Door tools, the pre-bent rods are inserted into the door cavity and, through careful manipulation, emerge on the inside of the window. The plated shafts are able to hold their shape but remain flexible enough to bend and form to the contour of the door.

    When using these tools, auto entry experts use extreme caution to avoid damage to internal door components and also use the Sully strips to prevent scratches on the glass surface. Each tool number is stamped on the handle for easy identification and replacement.


    Access Tools Contractor's Lockout Kit  See Details
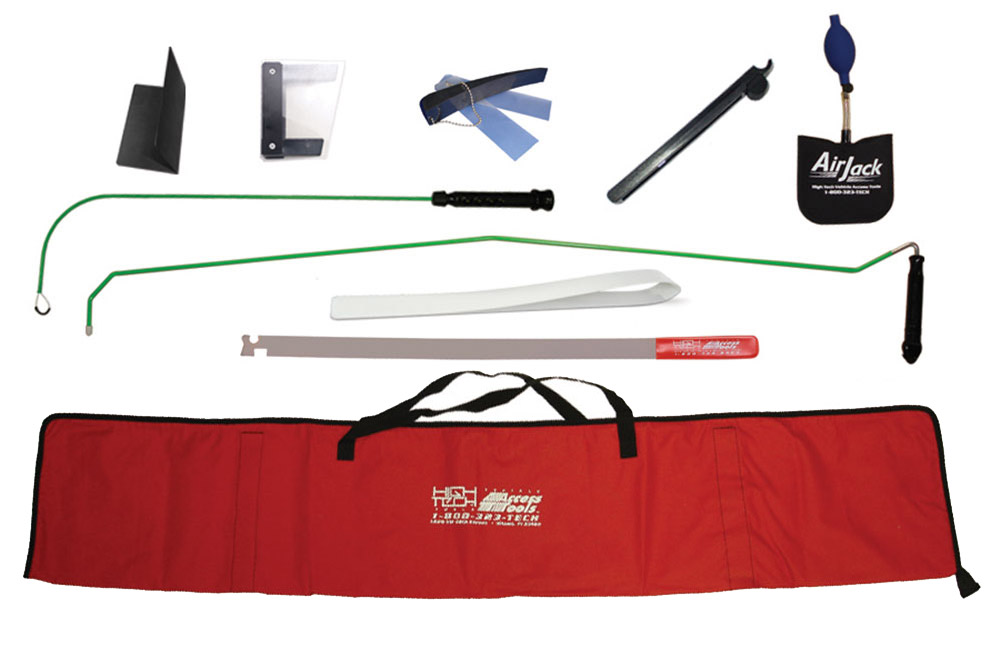
    actacs-1-access-tools-contractors-kit-web

    (1) Wonder shield
    (1) Glassman tool
    (1) Wedgee wedge with strip savers
    (1) Standard one-hand jack tool
    (1) Air Jack wedge
    (1) Button Master tool
    (1) Button Strip tool
    (1) Quick Max long reach tool
    (1) Slim Jim
    (1) Carrying case

    The Contractor’s Lockout Kit from Access Tools is the most popular and best-selling kit at Zips.com. Complete with a soft-sided carrying case to keep everything together, this kit offers several wedge options as well as unique tools for door pulls and unlock buttons.

    At 24-1/2", the Slim Jim tool included in this professional kit is made from stainless steel for added firmness, corrosion resistance and durability. As its name implies, the thin profile slides into the door cavity to reach door linkages for simple opening of any vehicle.

    Access Tools’ contractor kit also includes two options to reach the door lock knob. The Button Strip was designed for insertion into narrow gaps for grabbing vertical buttons, and with its handle-operated lasso, the Button Master was specifically created to pull up knobs.


    Save your customer’s day

    Unintentionally locking keys in a vehicle can be an embarrassing moment for your customers and cause unnecessary delays in their busy lives. Be a hero and come to their rescue with the right lockout tools from Zip’s AW Direct.

    Our rundown today of five different types of lockout kits should give you an idea of what you’ll need to respond to your next dispatch. If you don’t get a lot of those calls, a basic set may be right for you. However, if you handle a lot of them, consider a more comprehensive kit.

    Several more options are available at Zips.com. Click on the ‘Shop Products’ tab on the top navigation bar and then scroll down to Lockout Tools. Here, you’ll discover more kits and individual tools in a number of different categories.

    Find the options that are right for your operation. We also sell how-to manuals and include instructional videos on our product detail pages. These resources will come in handy the next time you head out to a lockout call.

     
  • Employee Profile: Jimmy Geerts

    by Nate Kuennen | Jun 17, 2022

    jimmy-geerts-header-img-1200x600

    Zip’s team member Jimmy Geerts operated large, eight-wheeled recovery trucks in the military and even helped to build a heavy-duty rotator when he first started here, but he has since found his niche in small wrecker assembly at New Hampton, IA.

    Work and life on a smaller scale suits him just fine. A native of nearby Alta Vista, Geerts hails from a community of just 200 people, and he is one of only seven employees who work in Zip’s newly-renovated--and air-conditioned--light-duty plant on the West Campus here.

    The crew there is separated into three teams. Depending on the model, lighting package and accessories, each team can turn out a light-duty wrecker in a week and a half. Some build sheets take a little longer; others are a little less complicated.

    As a former Iowa National Guardsman, Geerts said he understands the value of teamwork and appreciates the fact he can turn to his co-workers for advice and assistance when he needs it. He said they can almost read each other’s minds.

    “It’s really been a learning experience since I’ve started here,” said Geerts, now two and a half years in. “I feel like I learn something new every day. It’s awesome working with the guys here. It’s very good to have them as resources. We really work well together.”

    Geerts said he likes building new tow trucks because the parts, chassis and bodies are fairly clean to work on. He also said there is usually more room to work if he needs to run wires before the body is mounted to the chassis. Where things get a little cramped is on the topside.

    From brooms and shovels to dollies and jacks on the deck, “they pack a lot of stuff on these little things,” Geerts noted. “You really need to find spots to make all these things fit just right. It can be quite a puzzle at times.”

    Geerts said the best part of each build is when the truck passes quality control and they turn it over to the customer. The finished product gives him great satisfaction. “You can really take pride in knowing you helped build it, and the customer appreciates the work you put into it," he said.

  • Employee Profile: Steven Kurash

    by Nate Kuennen | May 23, 2022

    steve-kurash-outdoor-carriers-may2022-facebook-3

    You can’t spell car carrier without care, and you can’t build one without it, either. That’s what team member Steven Kurash puts into every rollback he assembles at Zip’s West Campus production facility in New Hampton, IA.

    Kurash--this week’s Meet an Expert-- joined Zip’s as a truck builder eight years ago and is now a crew lead on one of seven two-person teams at the carrier plant. He helps train new employees and is often tasked with building many custom carriers and as well as special edition show trucks.

    “Anything that’s a challenge, that’s what I like,” said Kurash, who has also helped design some of the storage brackets seen on many Zip’s car carriers. “If I had to build the same truck every day, I would get bored pretty easily.”

    Starting from the chassis up, Kurash said he and his partner produce--on average--50 to 60 car carriers each year. Depending on the build sheet, he said it takes three to four days to complete a standard rollback, whereas some of the more custom units can take quite a bit longer.

    Kurash said he takes a great deal of pride in the finished product and even takes pictures and videos of each build and keeps track of where they end up. He said he hopes the customer appreciates the extra effort and attention to detail he puts into each car carrier.

    “I’m very picky on my trucks,” he said. “I don’t care if it takes a little longer. It’s going to be done right. I don’t want to see it coming back for any reason if I can help it.”

  • Investing in an Air Bag Lifting System

    by Nate Kuennen | May 19, 2022

    SAVA-lifting-landing-bags-Blog-1200x350

    You’ve seen them deployed at recovery scenes by professional heavy-duty towing and recovery companies. Now, you’re thinking about adding a set to your operation. In today’s blog, we are going to answer some basic questions related to compressed air bag lifting systems.

    Produced from thick, pliable rubber to withstand extreme weight loads, air bags rely on compressed air to lift heavy objects, upright overturned vehicles or shift loads to the proper location. The source of the air can vary, but each bag usually has its own color-coded supply line for easy identification at the recovery scene.

    Depending on the manufacturer, air bags range in size from 6” square to 57” in diameter and can reach up to 7’ tall. Square, high-pressure bags generally provide the initial clearance to insert taller bags, while cylindrical, low-pressure bags finish the lift. Round landing or catch bags control the descent.

    On heavy-duty rollovers--such as a tractor-trailer on its side in the ditch--a series of lift bags are positioned under the wall of the trailer. As the bags inflate, wide straps and slings from the wrecker on the roadside lift at the same time to assist in the maneuver.

    catch-bags-with-bus-1200x700

    Catch or control bags are then placed underneath the casualty to soften the landing as the tractor-trailer reaches its critical tipping point. Straps from the wrecker also help control the landing, and as the weight of the trailer falls on the bags, air is released as the casualty drops back on its feet.

    By using air bags on both the lift and descent, heavy-duty tow operators are reducing the risk for further damage to the customer’s vehicle and the cargo inside. Depending on the weight of the load, semi trailer walls generally lack the structural integrity for a recovery using straps alone.

    Lifting in unison along the entire length of the trailer helps eliminate potential weak points. Deploying catch bags under the frame side of the trailer also helps reduce shock loading as the vehicle comes to a rest and thereby prevents a secondary rollover due to a slingshot effect.

    This controlled action protects rims, tires and suspension components from further damage. This maneuver also preserves--as best as possible--the cargo located inside the trailer and can usually prevent a costly and time-consuming off-load of the pallets or freight.

    Towing companies can generally recover the expense of air bag lifting systems by charging a separate line item for the service on their invoice. Depending on the size and quantity of a kit, the investment can be as high as $50,000. Most companies dedicate a separate response trailer for the set up.

    In addition to the air bags, other accessories required for a successful heavy-duty recovery may include an air compressor for the lift side, a blower for the landing side, air hoses to supply each bag and a deadman controller to operate all of the lifting bags at once.


    Frequently Asked Questions

    To determine if an air bag system is right for your fleet, we put together a series of questions to help you make your decision:

    Q: Are there different types of lifting bags?
    A: Yes. High-, medium- and low-pressure lift bags in square or cylindrical shapes.

    Q: What is the name of the bags which control the descent of a vehicle being uprighted?
    A: Terms and descriptions vary among manufacturers, but they are typically referred to as landing, catch or control bags.

    Q: How is air generated for the bags?
    A: The air can be supplied by a compressed gas cylinder, an air tank, a stand-alone compressor, a truck-mounted compressor, gas-powered blower or even a manual foot pump.

    Q: Are lifting bags safe to use?
    A: Yes, lifting bags can withstand four times the bursting pressure safety factor (EN 13731).Accessories are also fitted with safety valves which do not allow excessive pressure to build up.

    Q: How do I choose a suitable lifting bag?
    A: The following data is required to choose a suitable high-pressure lifting bag:

    • Shape of the load
    • Weight of the load
    • Required lifting height

    Q: Do lifting bags perform well on soft ground?
    A: Lifting bags are made from flexible, durable rubber, and the wide footprint provides stability on any surface. They can function in many different environments and weather conditions.

    Q: What size lifting bag is the most popular size?
    A: The 22''x22'' size is very popular. The working pressure of 116 PSI max translates to a 23.2 ton lifting capacity.

    Q: How is the air pressure measured?
    A: PSI (imperical) or Bar (metric). For example, an 8 Bar rated bag has a maximum pressure of 116 PSI.

    Q: What is the typical lifespan of a lifting bag?
    A: When properly maintained, you can use lifting bags up to 15 years before replacing.

    Q: What is the biggest advantage of flat lifting bag compared to conventional one?
    A: Flat lifting bags have greater surface contact and improved stability. You may be able to stack more than one together, giving you the desired lifting height.


  • Motorcycle Towing: Using A Light-Duty Wrecker

    by Nate Kuennen | May 06, 2022


    When you look at the business end of a light-duty wrecker, there doesn’t seem to be a whole lot of real estate available to transport a motorcycle. Unlike a car carrier, there are no platforms, no side rails and limited stability. All you have to work with is a narrow wheel lift.

    However, if your wrecker is equipped with an auto loader or a self-loading wheel lift, you’re in luck. Several wrecker manufacturers and after-market suppliers have designed brackets to help. They bolt onto or pin into the center beam of your auto loader just for the purpose of transporting motorcycles.

    18142-18822-two-ld-wrecker-trucks-red-black-feb-2022-low-res-17.-1200x500png

    Common to most late-model equipment, this T-shaped extension makes life easier when picking up a disabled bike. The extra length of the auto loader accommodates the size of most motorcycles out on the road. The crossbar provides tie-down points on each side of the bike.

    Uniquely designed for this type of wheel lift, storable motorcycle kits typically include brackets for both the front and rear wheels. Some also include a small loading ramp.

    The front wheel bracket likely includes a cradle to lock in the front tire. Beveled or flared sides help guide the motorcycle onto the center beam and prevent the tires from sliding sideways during transport. Most kits require only two straps on opposing sides to fully secure the bike upright.

    Most of the new light-duty wreckers assembled by Zip’s are sold with auto loaders. If you operate in an area with moderate to heavy motorcycle traffic, you may want to consider an auto loader and a motorcycle attachment. This will have you prepared for when that next bike call comes in. Plus, you can add more functionality to your fleet without the added expense of more trucks.

    For tips on loading a motorcycle onto a car carrier, click on this blog post. Here, we discuss three options for loading a motorcycle on a car carrier. We also discuss strapping points on a motorcycle which can apply to securing a bike to an autoloader.

  • Motorcycle Towing: Using a Trailer or Car Carrier

    by Nate Kuennen | May 06, 2022
    mtr8-2-1200x500


    Each spring, warmer weather tends to lure motorcycles out of hibernation and likely increases your chances for a two-wheel towing service job. Be prepared for your next dispatch with the proper procedures and aides for loading and securing a disabled motorcycle onto a car carrier.

    Here are a few helpful hints from the team at Zip’s AW Direct. Again, this is just for rollbacks and recreational motorcycle trailers. We will look at loading & towing a motorcycle options for light-duty wreckers in a future blog.


    Pre-Planning is Key

    msk100-all-grip-motorcycle-strap-kit-1200x500

    Before you leave the shop, make sure you have enough tie-down straps for the job. A fully dressed road bike can weigh up to 800 pounds. Depending on your equipment, you may need up to six lasso straps or more than one motorcycle sling kit to secure and haul a motorcycle.

    Secondly, pack enough clean, soft towels­--like microfiber cloths or plush covers. They protect polished and finished surfaces from contact with the straps or D-rings. Your customer will more than likely be on scene during the loading process, so you will want to show you care about their investment.


    Three Types of Loading Procedures

    We have found there are three common ways to load and secure a motorcycle onto a flatbed or car carrier. Each method hinges on the available tools, and what equipment you carry will depend on the frequency of motorcycle recovery calls.

    • Manually with tie-down straps only
    • Manually with wheel chocks and limited straps
    • Winch on with wheeled dollies and tie-down straps

    Manually loading a motorcycle onto a car carrier involves the most effort. Hopefully, a second person is available to help, or the owner of the bike can lend a hand at the scene. If working alone, you will likely need a running start to get enough momentum to push the bike up the incline.

    If this is your only option, we suggest you keep the kickstand down and place the bike in gear. This allows to keep the motorcycle in place once it’s loaded onto the flatbed and you release the clutch. Before you roll the bike up, engage the clutch with one hand and cover the brake with the other.

    Once onto the deck, raise the rollback to a level position with a smooth, steady motion. Do not jerk the bed or fully retract it until the motorcycle is secured with straps. This prevents it from accidentally tipping over.

    Also, make sure the back wheel of the bike is fully onto the deck surface before reclining. You can also place blocking behind the wheel to discourage negative movement.

    Adequate Strapping Points

    Depending on the weight of the bike and how many accessories are in the way, you may need to secure the bike with four to eight straps. Each pair should be installed in opposing directions at 45-degree angles to the flatbed surface. Fairings and saddlebags may present additional challenges, but here are some typical tie-down points:

    • Lower triple tree assembly at the front
    • Aftermarket crash bars on the side
    • Openings in the rear wheel

    With no other options available, the kickstand should allow you to stabilize the bike until you can strap it down for transport. We discourage straps across the seat, fuel tank or handlebars; and again, buffer your strapping with soft cloths to prevent unnecessary scratches or blemishes to finished surfaces.

    cp-sc-3-1200x500

    One equipment aide that could be helpful during the manual loading process is a front wheel chock. These metal brackets are permanently bolted to the surface of the car carrier or trailer deck and help keep the motorcycle upright during strapping and transport.

    Once installed, the cradle on these chocks can be adjusted for the front tire size. Fewer straps are probably needed with this option since the mechanism is able to hold the motorcycle in position. However, the manual loading process remains the same, and strapping should be adjusted according to the operator’s preferences and comfort level.


    Best Option for Reduced Effort

    The loading option offering the least amount of effort is using wheeled motorcycle dollies. Here, the front tire of the motorcycle is placed into the cradle, and straps are temporarily hooked from the triple trees to eyelets on the dolly. This balances the motorcycle as the carrier’s winch pulls it up onto the deck with V-straps.

    itd_1412_3-1200x500

    Once you have the motorcycle positioned on the carrier where you want it, remove the straps from the eyelets and hook them securely to the keyhole slots on the carrier deck or to another secure point along the siderails. Place additional strapping where necessary. The motorcycle does not have to be removed from the dolly or caddy prior to transporting a motorcycle.

    When first loading a motorcycle onto the dolly, it is best to position it at the lip of the tailboard or ramp. This prevents the wheels from rolling forward when you first push the bike onto the caddy. You will also want to insert the straps into the eyelets beforehand so you can simply reach down from the seated position and hook them around the front forks.

    Unlike wheel chocks, wheeled dollies are designed for interim use, and the wings easily collapse for storage in the underside compartment of your car carrier. This way, they are out of the way until you need them, which this time of year, may be more often than you think.

  • How to Choose a Winch: Sizes, Motors & Gears

    by Nate Kuennen | Apr 28, 2022

    Winches are designed to reduce the workload in many industrial settings and preserve the fun in most off-road recreational activities. Through gear reduction and auxiliary power, they provide extra pulling strength when and where you need it most. This can be off the trail, in the ditch, on the farm or in the water.

    In our previous blog, we looked at the different types of winch lines available. Today, we are going to discuss the various options to consider when you want to purchase a new winch. While recognizing the convenience of manual and portable units, we will focus our attention in this blog on the different varieties of permanently-mounted winches available at Zip’s AW Direct:

    • Power: Hydraulic or electric
    • Drive: Planetary or worm gear
    • Capacity ratings: Line and speed
    • Spool direction: Overwind or underwind

    Hydraulic planetary winches can be rated as high as 130,000 lbs. However, for the daily demands of towing and recovery, 30,000-lb. rated winches can typically handle the job.

    Electric winches stocked by Zip’s are normally used in light-duty applications and range in capacity between 1,000 lbs. and 15,000 lbs.


    Electric or Hydraulic

    Running off AC or DC power, an electric winch is generally easier to install and operate. Off-road enthusiasts such as ATVers and UTVers rely on the vehicle's battery to power the motor. This is useful for self-recovery if they get into trouble off the trail. Weekend mariners also use electric winches to load their boats onto trailers and to control their sails out on the water.

    However, this type of winch requires constant power to operate and needs rest between duty cycles. Conversely, a hydraulic winch requires a pump and additional plumbing to supply oil pressure to the winch motor but offers a longer running time. The trade-off for these additional hoses and components is increased power, improved durability and quieter operation.


    Planetary or Worm Gear

    Winches produce their pulling power through gear reduction. Although rotating at a higher rate, the motor doesn’t have to work as hard with a larger reduction ratio.. This ratio counts the number of times the motor is required to spin to get the shaft and the winch drum to make one revolution.

    Winches_Parts_Diagram_600x300

    A planetary gear borrows its name from the solar system. A “sun” gear is connected to the center shaft of the winch motor which then transfers torque to smaller gears “orbiting” around the sun. The smaller gears engage an outer ring gear to turn the drum. This multiple gear configuration translates to greater pulling power and speed.


    Winches_Parts_Diagram_Worm_Gear_600x300

    A worm gear consists of a cylindrical bar or worm screw with a spiral thread that drives a toothed gear. The hydraulic worm gears offered at Zips.com can pull up to 30,000 lbs., while electric worm gears can pull up to 9,000 lbs. A worm gear has a low transfer efficiency, increased gear reduction and much slower line speed.


    Line Ratings and Speed

    As stated earlier, winches are rated for their pulling capacity and line speed. They are the first factors you should consider when purchasing a winch. The maximum pull for a given winch is based on the first layer of spooled line and diminishes by approximately 10 to 12 percent for each additional layer of rope. 

    When sizing your winch, you will need to determine which layer will do the most work in your application. The following example of reduced capacity is based on five layers of 3/8” steel rope on an 8,000-lb. rated winch:

    • First layer: 8,000 lbs.
    • Second layer: 6,700 lbs.
    • Third layer: 5,700 lbs.
    • Fourth layer: 5,000 lbs.
    • Fifth layer: 4,500 lbs.

    According to Ramsey Winch, the rated line pull of the winch must be high enough to pull your vehicle’s gross vehicle weight (GVW.) It also must overcome resistance when stuck or on an incline. This particular winch manufacturer recommends a rated line pull at least 25% greater than your GVW. This helps account for any additional weight–like fuel–in the vehicle you are recovering.

    Winches are also rated for line speed, rope diameter and length. Hydraulic planetary winches tend to have a faster line speed, which can be critical to getting tow operators off the road in a timely manner.

    Line speeds are typically measured in feet per second under minimal load. For hydraulic units, the flow of hydraulic fluid to the drive—usually 15 gallons per minute maximum--determines the line speed rating.


    Spool Direction

    Winch lines can also be spooled in an underwind or overwind direction, and winch motors are positioned in either a lefthand or righthand configuration with forward and reverse controls, depending on model. Each winch has a clutch to engage for operation or disengage for free-spooling. Please refer to the winch’s owner’s manual or the rotation decal affixed to the winch housing for proper spool direction.

    There are a number of factors to consider when purchasing your next winch. We hope this blog helps in the decision-making process. Be sure to follow manufacturer instructions for installation and maintenance of your new winch. Here are some good tips to follow to ensure a long lifespan, regardless of type and size of winch you choose to purchase:

    • Lubricate grease fittings on winch, housing and drum monthly.
    • Check hydraulic oil level and electrical connections weekly.
    • Scan winch line for flat spots, stress and fraying daily.
    • Avoid bird’s nesting with power wrapping and cable tensioner.
    • Inspect mounting bolts and tighten as necessary

    18822-ld-wrecker-black-feb-2022-low-res-24-1200x550

  • Cleaning Hi-Vis Apparel: Washing, Drying & Stain Removal

    by Nate Kuennen | Apr 25, 2022

    Blog_Hero_HiVisCleaning_Eductaional_1740x500

    You wear hi-vis apparel to ensure your personal safety in high-traffic work areas. The bright colors, reflective striping and breathable materials combine to keep you visible and comfortable on the job. Ask any emergency personnel, tow truck operator or construction crew member, and they’ll tell you how important hi-vis outerwear is to their profession.

    However, given the conditions you work in, keeping ANSI-rated apparel looking its best may be a challenge. Grease, oil, mud and grime all seem to find their way onto your vests, shirts, coats and bibs. Preventing those undesirable substances from making a permanent home on your clothing takes some effort. We’re here to help with some advice on caring for your hi-vis garments.

    Safety apparel is made from a range of materials: from thin polyester mesh for your vest to polyurethane-coated ripstop fabric for your rain gear. Regardless of textiles, though, the first place you should look for the care of your garments is on the manufacturer tag sewn into the interior neck, back or side area. Those instructions will spell out your next steps.  

    hi-vis-care-blog--apri-2022-low-res-1-2  hi-vis-care-blog--apri-2022-low-res-7


    Getting Started

    IMG_0074 (1) before (1)

    Before you begin to wash, give yourself a headstart toward a clean result by following these basic tips: 

    • Make sure to knock off all loose dirt with a brush
    • Wipe away any residual grime with a dry cloth
    • Spot clean stains with a safe remover
    • Pre-soak if allowed by apparel manufacturer

    Some garments feature a water-repellent finish so removing debris may be easier than other styles. Pre-soaking may help but is not required and sometimes not recommended. Check your tag to be sure. Failure to remove surface dirt and grime may result in the impurities becoming embedded in the fabric and ending up as a permanent stain.

    For stain removal, pre-treating is likely your best option. You may be able to apply a mild stain remover before washing, such as OxiClean or Shout. A degreaser or mineral spirits may also work but only in cases of hand-washing. We do not encourage solvents in a machine wash setting. It is best to pick a concealed area to see how the garment will react before proceeding.

    Here are some basic reminders for stain removal:

    • Find a stain remover approved for fluorescent fabric
    • Test the cleaner in a less visible area
    • Treat the spots with a clean cotton rag
    • Gently rub remover into stain
    • Wipe off excess solution and grime


    Washing and Drying

    Now that you’ve prepped the surface, it’s time to wash. Some garments allow for machine washing, either at home or in an industrial setting. If that’s the case, we recommend washing in cold water on the delicate cycle with a mild detergent. Shampoo may also be an option instead of laundry soap. 

    To prevent fading and discoloration, you should avoid using bleach or fabric softener. You bought these garments for their illustrious properties. You don’t want to diminish that effect on the first wash. You should also turn your garments inside-out and wash with like colors and fabrics. In other words, don’t wash a mesh vest with blue jeans.

    Drying instructions will vary also. The main point to remember here is you don’t want to damage the heat transfer tape or adhesives used to apply the reflective stripes to your apparel. Again, refer to your garment’s care instructions. Tumble dry on low may be an option. Otherwise, hang drying may be your only choice.

    Here are some points to consider if you plan to machine dry your hi-vis apparel:

    • Put on the lowest temperature setting possible
    • Remove apparel immediately after cycle is complete
    • Hang up to prevent wrinkling and creasing on stripes


    Special Considerations

    As we noted earlier, safety apparel with reflective tape requires special attention. Improper washing techniques may diminish the garment’s protective qualities. If you’re unsure how your treatment plan will work, you may need to test clean in an inconspicuous area or simply spot clean the apparel altogether.

    Other fabric considerations include working with apparel that has snaps and any hook-and-loop closures like Velcro. These fasteners may catch on mesh material and cause fraying. To prevent potential damage, you may need to button everything up before throwing them in the wash. You should also not leave your soiled apparel in a pile on the floor or in the back of your truck until wash day. Try and wash everything right away to prevent dirt and stains from setting in.

    gss-5123-1-short-sleeve-safety-shirt-blue-in-use-web

    Please note some safety garments may give you an advantage by offering color-block and stain-block technology to help repel impurities. Additionally, several apparel manufacturers offer hi-vis clothing with “black bottoms” to conceal dirt and help you maintain a professional, clean look. If either of those styles and ANSI ratings work for your needs, perhaps they should be added to your wardrobe.

    Whether you’re looking to upgrade or just maintain what you have, we realize you’ve made a significant investment in your hi-vis outerwear. You want it to last and look its best so you can be seen by others. Proper care of your apparel is key to its longevity and continued visibility. We hope you find these tips helpful.

     
  • Types of Winch Lines: Synthetic vs. Steel

    by Nate Kuennen | Apr 14, 2022

    Winches and winch lines are valuable tools across a variety of industries and applications, including towing and recovery, transportation, agriculture, construction, oil and gas and off-road recreation.

    Over the next couple of weeks, we are going to look at the different types of winches and winch lines out there to discuss what you need to look for when upgrading your equipment or ordering new. Today, we’ll touch on the five winch line types available from Zip's AW Direct.

    • Synthetic Rope
    • Fiber Core Wire Rope
    • Steel Core Wire Rope
    • Super Swaged Wire Rope
    • Super Flex Wire Rope


    Synthetic Winch Lines

    17121-hd-wrecker-black-mar2021-hi-res-23-400x350

    The first kind of winch line we’ll look at is Synthetic. Gaining in popularity in the towing & recovery industry, this braided fiber rope has been around commercial applications for decades with a proven track record in many industries, according to Jeff Lechtenberg, product manager at Zip’s AW Direct.

    Zip’s stocks diameter sizes ranging from 5/16” to 7/8” and are available in lengths up to 250 feet. Larger diameters and longer lengths can certainly be accommodated and are used in many applications. Synthetic winch lines can be used with winches installed on endless types of equipment and vehicles. Producing a maximum strength-to-weight ratio, synthetic ropes are equally as strong in pulling capacity but up to eight times lighter than steel.

    “Synthetic rope is so lightweight that it floats,” Lechtenberg said. “It doesn't store as much energy under load as steel lines do, and they do not have sharp burs so it can be handled without gloves. They are also “torque-neutral” so a swivel hook or shackle is not needed - your line won’t twist like a steel line.”

    Synthetic rope is also available in a rainbow of colors so you can custom match your rope to your vehicle or you can color coordinate your winch lines to their specific capacity or winch controls. Here are a few more benefits from Lechtenberg to consider with synthetic rope:

    • Zero corrosion
    • Repairable in the field
    • Wear resistant
    • Sun resistant
    • Impervious to many chemicals
    • Low stretch
    • Reduced flex fatigue


    Steel Winch Line Varieties

    EndofWinchLine_Illustration_HowTo_Measure-01-01-400x400

    If you are more of a traditionalist, there are several types of steel winch lines to consider, beginning with Fiber Core wire rope. Made from extra improved plow steel, these winch lines ensure a longer life span by excreting lubricant under pressure to minimize wear and corrosion on the wire.

    Next, Steel Core winch lines are also made with extra improved plow steel, which provides superior strength and flexibility. Steel core winch cables offer greater crush resistance and a higher nominal strength compared to fiber core, but they are not as flexible as fiber core.

    Another type of steel winch line is called Super Swaged. Meaning the rope starts off as the next size bigger but, through a process called swaging, is compressed down to the next size smaller. As a result, the outer wires have a larger surface area than standard winch lines.

    The working load limit remains the same as the original diameter. The compact design offers greater strength than standard winch lines of the same size. Although less flexible, they also provide better resistance to abrasion, kinking and drum crushing.

    The last type of winch line to review today is Super Flex wire rope. This type of winch line offers better performance and increased longevity. It does so by containing more wires within a given diameter, resulting in less fatigue. This makes the line more resistant to wear and tear.


    Ordering and Hardware

    All of our replacement winch lines include attachment hardware. However, if you need to replace a hook, thimble, clip or socket, we have the parts you need in our Hooks and Hardware department at Zips.com. You can also order any type of the five winch lines described earlier here as well.

    Before you order your new winch line, double-check your winch’s owner’s manual or its identification plate and find the correct wire rope size. It is recommended to follow the winch manufacturers required diameter and lengths. In the towing and recovery industry, automotive car carriers typically use 3⁄8" rope, medium-duty tow trucks typically use 7⁄16", 1⁄2" or 9⁄16" rope and heavy-duty tow trucks typically use 5⁄8", 3/4" and 7/8” rope.

    rope-sizing-before-you-order

    Measure your rope as shown in the diagram above or slip a socket wrench over the plain end for a fast, accurate measurement. Be sure to measure the distance between the outside edges of the two opposite bundles. Not the distance between the flat sides.

    Lastly, consider the appropriate Working Load Limit (WLL) for your winch and recovery efforts. Winch lines are rated by size capacity and Minimum Breaking Strength (MBS). WLL is determined by a safety factor of the MBS. For example, a 3:1 safety factor means the MBS is three times the WLL.


  • ANSI Standards for Hi-Vis Safety Apparel

    by Nate Kuennen | Mar 30, 2022

    ANSI-Blog-Collage-1970x705

    Where you work and what you wear makes a difference for your personal safety. as it relates to compliance with national standards for apparel and visibility on roadside construction projects and other high-traffic jobsites.

    Two professional organizations have identified three types of work environments and three classes of apparel for these requirements. The International Safety Equipment Association (ISEA) develops the standards, and the American National Standards Institute (ANSI) approves them.

    The ANSI/ISEA 107-2020 Standard on High Visibility Safety Apparel (HVSA) was first drafted in 1999. It outlines criteria for the general design, testing and labeling requirements for applicable garments.

    These compositions use fluorescent colors and reflective striping to grab the attention of passing motorists and other workers. This is especially important for crews working in high-risk industries such as towing and recovery, construction, and emergency response.

    The intent of these standards is to improve worker visibility and to reduce the number of roadside injuries and deaths. According to ANSI, nearly 1 in 5 construction workplace fatalities is defined as a “struck-by” injury. Which is when a worker is hit by a piece of equipment or vehicle.

    Although the ANSI/ISEA 107-2020 is a voluntary standard, hi-vis apparel such as vests, shirts and jackets must be worn to comply with federal regulations that cover work environments where struck-by hazards are present. All hi-vis apparel should provide 360 degrees of visibility.

    B103-HERO_Construction (1)

    The apparel standard separates garments by type, according to the following document  from hi-vis apparel manufacturer Kishigo: ANSI/ISEA 107-2020 - Basics

    • Type O is for Off Road work in zones that have restricted access to public vehicles but still pose a low visibility struck by hazard.
    • Type R is for Roadway work zones which include exposure to traffic (vehicles using the highway for purposes of travel) from public access highway rights-of-way or roadway temporary traffic control zones or from work vehicles and construction equipment within a roadway temporary traffic control zone.
    • Type P is for First Responders who are exposed to all the hazards of Type R work zones but also have competing hazards or require access to special equipment.

    The three main classes of garments are defined numerically. Each rule is affected by each Type category. Class 3 carries the most stringent requirements and is required for workers present near roadway traffic traveling in excess of 50 mph. Class 2 and Class 1 are less restrictive.

    ANSI-Classification-Graphic-withIcons-1200x450

    Class 3

    In Canada, the Class 3 requirement calls for reflective stripes around the arms and legs and an X on the back of the apparel. In America, the standard looks at total reflective coverage contrasted against bright, fluorescent colors:

    • For Type R environments, Class 3 apparel requires 310 square inches of reflective material and 1,240 square inches of background material
    • In Type P environments, Class 3 also requires 310 square inches of retroreflective material but only 775 square inches of background material.
    • The minimum width of the reflective material for Class 3 in both Types is one inch in split trim design.


    Class 2

    Class 2 is designed for crews working near roadway traffic traveling 25 to 50 mph. Again, compliance is measured by total surface area coverage:

    • Class 2 for Type R requires 201 square inches of retroreflective material and 775 square inches of background material.
    • Class 2 for Type P requires 201 square inches of retroreflective material and 450 square inches of background material.
    • The minimum width of the reflective material for Class 2 in both Types is one inch in split-trim design.


    Class 1

    Class 1 is for off-road environments with traffic traveling below 25 mph. Workers may not be required by law to wear hi-vis apparel but may still work in an environment with moving equipment, vehicles and other potential harzards.

    • Class 1 for Type O work environments require 155 square inches of retroreflective material and 217 square inches of background material.
    • The minimum width of the reflective material is one inch.

    Hi-vis pants, bib overalls, shorts and gaiters are designated Class E and do not meet HVSA requirements when worn by themselves. When a Class E item is paired with a Class 2 or Class 3 top, the overall classification is Class 3.

    According to Kishigo, hi-vis apparel manufacturers are required to certify the performance requirements of the materials used and need to document that their finished products also meet the HVSA requirements.

    It should also be noted that the position of company logos and lettering can affect the ANSI rating. Additionally, not all hi-vis apparel meets ANSI standards. To learn more, a copy of the HVSA can be obtained from the ANSI website at www.ansi.org.

    Make sure your employees are safe and visible by understanding and following these standards. Calling attention to these high-traffic work zones through bright and colorful clothing with reflective striping can help reduce the risk for personal injury or death.


  • Get to Know Snatch Blocks: Their Uses, Parts and Care.

    by Nate Kuennen | Mar 07, 2022

    snatch-blocks-cover-photo-march-2022-hi-res-11-zips-blog

    Snatch blocks are essential rigging and recovery tools. Available in a wide selection of sizes and capacities, these sheaves and attachments provide a critical pivot point to change the angle and direction of a pull or increase the load capacity of a winch line.

    Snatch blocks are for use in the recreational market, towing and recovery industry, overhead crane operations and many other industrial applications. They are compatible with both synthetic line and steel cable. Each snatch block is dual labeled with its pulling capacity and acceptable rope size.


    zsb8t6-4-zips-snatch-block-swivel-hook-8ton-6inch-low-res          zsb2t3sw-zips-snatch-block-swiv-shackle-low-res-2


    Moving Parts

    Traditional snatch blocks consist of a single pulley or sheave protected by two outer teardrop-shaped side plates.

    A release pin with a cotter key sandwiches the plates together over the pulley. To insert the winch cable or line, the pin is removed by turning the nut counterclockwise by hand. This allows access to the inner pulley. Be sure to reinsert the cotter key after screwing the plates back together.

    Most snatch blocks come equipped with bronze bushings for longevity and smooth operation. To aid in routine preventative maintenance, a grease zerk is located on the outside of the center sheave pin. Weekly lubrication is suggested.

    Daily inspection of each snatch block is recommended prior to use. Snatch blocks should also be stored inside a toolbox or compartment to protect them from the elements when not in use.

    SnatchBlock_Parts_Diagram


    Common Attachments

    snatch-block-blog-hero-1

    Snatch blocks are available with three common attachments: swivel hook with latch, swivel shackle and chain end with grab hook. Each serves its own unique purpose, depending on the type of application and equipment being used. For this blog, we will focus on usage in the towing and recovery industry.

    On a car carrier, a chain link or hook end can be inserted into the keyhole slot on the tailboard to change the direction of the winch line. This is particularly useful when the tow operator is looking to keep a lane of travel open while recovering a casualty from a roadside ditch or tight parking lot.


     For Example, the other two types of snatch block ends are typically used during heavy-duty recoveries. If the operator is looking to lower the angle of the pull and create downward pressure. This winch line redirection is especially useful while responding to a vehicle rollover or uprighting a tractor-trailer.

    “Many tow operators will attach a snatch block to a lower point like a D-ring, stiff leg or wheel lift on their own truck to get the angle pulling down for a rollover situation, versus going straight off the end of their wrecker boom,” explained Ed Peichel, a product sales representative at Zip’s AW Direct.


    Safety Always

    Besides routine maintenance, operators should position themselves away from the direction of the pull whenever possible during operation for safety in case a winch line should fail. To avoid failure caused by misuse, users should never exceed the rated capacity of the winch line and snatch block.

    Capacities typically range from 2 tons to 22 tons, and pulley diameters range from 3 inches to 12 inches. In general, the larger the diameter, the greater the working load limit (WLL), although some pulley sizes can handle multiple WLL ratings. See the chart below for examples of common snatch block sizes in relation to WLL.

    Pulley Diameter WLL
    3" 4,000 lbs
    4" 8,000 lbs
    6 16,000 lbs
    8 30,000 lbs
    10 30,000 lbs


    By running winch lines back through snatch blocks, operators can also increase the capacity of their winch lines. Oftentimes this doubles the pulling force. Again, users should refer to their equipment operating manuals and rated capacities to avoid overloading.

    “Always calculate the resistance of your pull and use proper rigging to both the casualty and your equipment,” Peichel said.


    Best Practices

    Snatch blocks are a great tool in towing and recovery scenarios, for recreational use and for overhead lifting applications. Here are a few tips to follow to ensure you get the most of your investment and prevent unintended damage or injury.

    1. Inspect prior to using your snatch blocks
    2. Lubricate pulley as needed
    3. Protect against the elements
    4. Stand away from winch line & anchor points
    5. Do not exceed rated capacity
    6. Refer to equipment manuals for proper usage
  • Zip's employees featured in local newspaper

    by Cameron Hanson | Sep 03, 2020

    newwomenintheworkplace

    A pair of female employees at Zip's AW Direct in New Hampton, Iowa, were featured in the New Hampton Tribune Sept. 1 as part of the local newspaper's 'Women in the Workplace' series. Nearly a third of Zip's 225 employees in Iowa and Michigan are women.

    Jennifer Klassen (right) has served as Zip's showroom receptionist for the past six years. She considers herself the "customer concierge" here, and in that role, she said she wants to make customers feel welcomed and comfortable during their visit to Zip's.

    A self-described "people person," Lori Throndson  (left) has worked as a personal truck sales consultant at Zip's the past year and a half. Starting off in customer service, she is now one of 12 people in equipment sales and the only female in what she calls a "man's environment."

    Click here to read their entire stories and to learn about their career journeys to this point. 

  • Welcome, Canadian customers!

    by Cameron Hanson | Jun 23, 2020

    nrilandingpage

    Zip’s AW Direct offers hassle-free shipping to Canada and has created a landing page for Canadian customers to access our products at zips.com/nri-canada.

    Our company is a registered Non-Resident Importer (NRI) through the Canada Border Services Agency (CBSA) and provides simplified shipping of our products direct to your door. Canadian customers pay the UPS Ground Shipping. We pay the duties and the brokerage fees.

    Our goal is to provide a rich and rewarding shopping experience for our Canadian customers. Buy in confidence with us, knowing the products you order online will arrive at your doorstep when you need them.


  • Employee Profile: Brice Schissel

    by Cameron Hanson | Apr 01, 2020

    brice-schissel-april-2020-employee-profile

    If you’ve ever received an order from Zip’s AW Direct, chances are Brice Schissel played a role in getting it to your door. Schissel serves as the Distribution Center Manager here and oversees the processes which fulfill nearly 400 customer orders every day.

    Schissel, our employee profile for the month of April, doesn’t do it alone. He said he is a proud member of a 30-person team which works hard every day to make it all happen. He credits everyone involved in the supply chain for the warehouse’s success and level of customer care.

    “I love the people I work with,” Schissel said. “The people I deal with on a daily basis are all good people and very easy to work with. Even the ones I don’t see every day, or talk to every day, are always very nice and friendly when I do see them or have a problem to work out and I need their assistance.”

    In role since late 2018, Schissel manages inventory levels, fills in for absent employees, helps fulfill walk-in orders in the parts department and, lately, makes sure the truck shop has the parts needed to complete their tasks. He and warehouse manager, Abe Karels, also check in with their staff regularly.

    “Sometimes during the day, Abe or myself will do walk-throughs just to make sure things are going smoothly and people aren’t having problems in shipping and receiving or in the warehouse,” Schissel said. “We work together every day to help each other out and make both of our jobs a little easier.”

    Schissel said he also dedicates a portion of his shift to either building kits or making sure kits are assembled to keep up with demand. Everything from axle chain kits and tie-down kits to fork kits and strap assemblies are created from their individual parts bins in the warehouse.

    “Normally, I start my day by printing reports to tell me where the inventory levels for the kits are,” he explained. “We have a huge number of kits that we manufacture ourselves here, so we try to keep the levels high enough to suffice the traffic of certain items.”

    In fact, ratchets, straps, chains, slings and tow dollies are some of the most popular items sold by Zip’s AW Direct, which Schissel attributes to tow companies remaining very busy this year. Other top-sellers include hi-vis apparel, lockout tools and truck lighting.

    “The list could go on forever,” Schissel said of the shipping trends here. “I would say the season definitely has a lot to do with what we sell and how many sales we do. During the colder season, we sell a lot more winter jackets, pants and coveralls. We’ve also been selling a lot more insulated gloves.”

    In his spare time, Schissel and his wife, Debbie, are busy with a six-month-old daughter, Harper Lee. “I spend as much time as I can with them,” he says. He’s also active in bowling in the New Hampton and surrounding area and recently rolled his first 300 game, “which was a major accomplishment for me.”

    He said he also enjoys hunting and fishing and “just about anything that has to do with the outdoors.” He also likes to cook on the grill and with his smoker. But when the weekend’s over and his batteries are recharged, he’s ready to get back to work and do his part to fulfill customer orders.

    “It makes it a lot easier to get up in the morning and come here every day knowing that I work with such awesome people,” he said. “I’m very lucky and very fortunate to be a part of the Zips AW Direct family.”

  • Zip’s is now an authorized Landoll dealer

    by Cameron Hanson | Mar 17, 2020

    2016-FoleyCat-400Series-April1-Construction-82

    Zip’s AW Direct became a fully authorized Landoll dealer in February of 2020. This latest addition of heavy-duty industrial trailers complements Zip’s already impressive inventory of tow trucks, industrial carriers, rollbacks and service vehicles.

    “We are excited about this new opportunity for our company and look forward to sharing Landoll’s extensive lineup of heavy-duty trailers with our existing and future customer base,” Zip’s President Paul Rottinghaus said.

    Based in Marysville, KS, Landoll has been producing trailers and farm equipment for more than 55 years. In addition to traveling axle trailers, the company also builds detachable trailers, traveling tail trailers, bottom dump trailers, industrial tag trailers and more.

    Zip’s is authorized to sell all types of Landoll trailers and replacement parts. Tow operators will find these trailers useful for large-scale recovery operations, and construction, rental and agricultural companies will appreciate how easy it is to transport their equipment with them.

    Complete details are available in our Landoll Brochures and Landoll Parts Manuals. You can also visit our Industrial Trailers page at Zips.com to view our current inventory.

    To purchase, contact one of our personal truck sales consultants at 800-222-6047 today. We look forward to working with you. 

  • Employee Profile: Tiffany Fisher

    by Cameron Hanson | Feb 25, 2020

    tiffany-fisher-spotlight-feb-2020-1-blog

    More than 30 employees team up to fulfill close to 400 orders each day in the Distribution Center at Zip’s AW Direct in New Hampton. This includes small parcel packages as well as large freight shipments.

    One of our dedicated shipping agents is Tiffany Fisher, a New Hampton native and our employee profile for the month of March. Tiffany has worked in the shipping department here for four years and takes pride in ensuring customer orders are accurate before shipping them out.

    Her husband, Brian, also works at Zip’s as a lead heavy-duty body installer, and the family-friendly environment here is what Tiffany said she values most about coming to work every day. “I really enjoy the friendly atmosphere and the friendships I’ve made from working here,” she said.

    In her spare time, Tiffany said she enjoys camping, hanging out with friends and “being out on the water.” Most importantly, though, she appreciates the time she can spend with her family. It’s what motivates her both personally and professionally.

    “My kids and my husband are my motivation,” Tiffany said. “I always try to do what’s best for them and our family.”

  • Add winch line power wrapping to your weekly maintenance routine

    by Cameron Hanson | Feb 05, 2020

    16731-power-wrapping-blog-feb-2020

    Keep the cable on your winch drum neat and tight through a weekly maintenance procedure known as power wrapping. This exercise will prolong the life of your winch line by preventing weak points caused by unnecessary kinks and flat spots.

    “You should power wrap your winch at least once a week,” recommends Rene Jimenez, a technical advisor at Zip’s AW Direct. “You want to keep your wire rope tight on the spool so it doesn’t dive or kink and start what I call the paper clip effect, where the more it bends, the weaker it gets before eventually failing.”

    Power wrapping works in tandem with the cable tensioner. As illustrated in this video from Miller Industries, the procedure is performed by free-spooling the winch line out and then winding it back up under a load by attaching the hook to another vehicle or deadman.

    “As you pull the wire rope out, you want to keep at least seven wraps on that last layer so you don’t pull all of the wire rope out of the drum. That would create quite a mess,” explains Miller’s Billy Drane in the video.

    Experts say power wrapping should be done regardless of the size of the winch: from car carriers to heavy-duty recovery vehicles. The procedure is effective for both wire and synthetic rope. In fact, according to Jimenez, power wrapping helps “set the braid” on a new synthetic line.

    Power wrapping is “something that is very important to do,” Drane said. “What can tend to happen (when you don’t) is the loose wire rope going around the drum will cause the top layers to bury down (or dive) into the inner layers.”

    “Once you get in the habit of doing this regularly, it really doesn’t take very long to do,” Jimenez said. “Take a few minutes each week to prevent a headache down the road.”

  • Batteries don’t like the cold weather either

    by Cameron Hanson | Feb 05, 2020

    jump-pack-collage-feb-2020-1

    Be prepared the next time your car won’t start with a jump pack from Zip’s AW Direct. We stock handheld chargers for the consumer, and powerful jump packs for the professional. In today’s blog, we are going to review a few of the models we currently have in stock.

    The first item to consider when purchasing a new jump pack is safety. Look for models with reverse polarity protection. This safeguard prevents usage when the cables are not connected correctly. You should also keep an eye out for battery packs that won’t function when the voltage setting is wrong.

    Another factor to look at is cable length, especially with a larger jump pack. Be sure to account for adequate clamp reach so the jump pack can rest safely on the ground. This prevents the pack from teetering on engine components or fenders when the hood is open on the disabled vehicle. 

    Cable length is also important when connecting to terminals located inside of a vehicle. This keeps the power pack away from interior upholstery and prevents an unnecessary mess. Let’s face it. Jump packs only look new and clean once.

    Cranking amps and battery ratings are also important items to research when purchasing a jump pack. Handheld models typically have lithium ion batteries. Their ratings are based on engine size. Larger jump packs with internal lead-acid batteries normally list cranking amps for capacity. 

    Based on size, here are some of the jump packs Zip’s AW Direct has to offer. Be sure to click on each name to link back to its respective product page for complete details. 

    • On the smaller scale is one of our newest models, the NOCO GB150 Boost Pro. This 4000-amp unit weighs just 7.5 pounds and can handle up to 80 starts per charge. The USB port can also charge personal electronic devices. 

    • Next up is the Weego Crankenstein. The lithium-ion battery here can last up to 30 hours and can recharge in just six hours. The Crankenstein includes an LED flashlight and can hold a charge for one year. The built-in voltmeter also comes in handy.

    • Perhaps one of our more popular models is the Jump-N-Carry JNC660 jump starter. This low-cost model features 425 cranking amps and 1700 peak amps. The unit weighs 18 pounds and features a DC outlet to power 12V accessories.

    • A close cousin to the JNC660 is the JNCAIR, which offers the same capacity as the JNC660 but includes an internal air compressor. You can fill one flat tire under eight minutes and up to four tires on a single charge. The coiled air hose stretches to 12 feet and delivers on-demand air. 

    • Two 12V heavy-duty sealed AGM batteries provide "Best in Class" performance for Associated Equipment's 6296 jump starter. This unit features 720 CCA of power and has a three-position "On/Off" switch with Easy-to-read LED battery status indicators.

    • The last battery pack we’re going to look at is the Rescue 2100 from Quick Cable. This commercial-grade model offers 900 12V cranking amps and includes a 15-amp circuit breaker, worklight, and warning flasher. The Rescue 2100 does weigh a little bit more but delivers enough charging power for most applications. 

    We hope you find this quick overview of jump packs at Zip’s AW Direct useful. To view our entire lineup, click on ‘Jump Start Equipment’ under ‘Roadside Assistance’ under our ‘Products’ section at zips.com.


  • Employee Profile: Randy Wickman

    by Cameron Hanson | Jan 28, 2020

    randy-wickman-spotlight-jan-2020-1-blog

    Randy Wickman joined Zip’s AW Direct five years ago as a service writer and warranty rep. He was named service manager for our used truck division about a year ago. He now oversees repairs and reconditioning of used truck trade-ins and helps determine what repairs need to be made before resale.

    Given his “intimate knowledge” of each used truck, Randy said he can offer support to the sales staff here and can also be a resource for the customer after the purchase. “I am always available to assist with each potential sale and provide advice on the unit’s representation,” he said.

    In addition to sales and shop personnel, Randy said he works with several other departments at Zip's AW Direct, including the body shop, car carrier plant, finance, marketing and shipping and receiving. He described his co-workers as an “amazing team of people.”

    “I work with each department to make sure our jobs get completed and out to our customers,” he said. “I enjoy my position in the service department because I get to interact with almost every department here.”

    Randy said he is proud of the trucks Zip’s produces and enjoys seeing all of the Zip’s-built trucks on the road, making recoveries and taking care of customers. That pride motivates him to make sure every job he takes on is “done right” and to the best of his ability.

    “At the end of the day, I drive home knowing that I did the best job possible with each project I take on,” he explained.

    Home is now an acreage he and his wife recently purchased. When he is not busy settling in and making improvements, Randy said he enjoys racing motocross in his free time and rebuilding dirt bikes in his shop at home.

  • Make an Informed Purchase on You Next Tow Dolly

    by Cameron Hanson | Jan 16, 2020


    There are numerous factors to contemplate when buying a brand new tow dolly. Zip’s AW Direct offers a variety of Collins and In The Ditch dollies. We carry nine different models with capacities listed at either 3,040 pounds or 4,280 pounds, depending on tire size.

    Today we break down the components of a tow dolly sets and explore how they relate to durability and maintenance. The blog post and video provide more information on the topic. The blog post provides a detailed outline of the key points.

    Each featured part of a dolly offers benefits and limitations, both of which can affect the price range of $1,485 to more than $2,000 per set.

    Tow dollies have 8” utility tires, allowing them to have a maximum road speed of 60 mph. Making them a good choice for short and medium distance travel. However, most operators prefer to stay at or below 50 mph for safety.

    Based on your use cases, choose from 5.70 or 4.80 tire sizes with steel or aluminum wheels. Besides speed, tire sizes also affect load capacity: the larger the tire, the greater the load it can handle. Be sure to check tire pressures regularly on your tow dolly tires, for maximum safety and efficiency.

    Dolly assemblies are made from steel and are available with aluminum or steel axles. Aluminum axles offer a weight savings that your operators will appreciate. Steel components can be zinc-plated or powder-coated with each offering its own level of durability.

    Another item to consider is maintenance, especially this time of year. Tow dollies can often be neglected, and replacing a set may be the reason you’ve landed here. Zip’s AW Direct offers dollies with easy-to-lube grease zerks or with maintenance-free hubs. Featuring automotive sealed hubs and bearings, the latter can save you time and money and extend the life of your dolly. Choose what best fits your operation.

    You can compare options and learn more by visiting our tow dolly section online at www.zips.com/towing-accessories. Here you will find detailed product descriptions as well as tables identifying which features accompany each model.

    Also, don’t forget to check out our replacement dolly parts as well as our deck mounts and storage racks for your dollies when they are not in use.